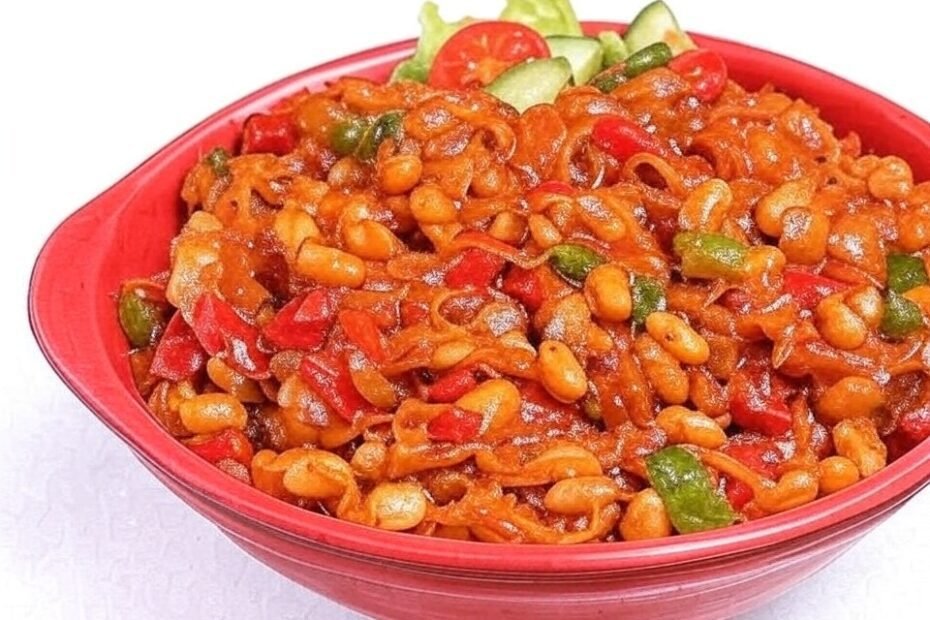
Chakalaka is a vibrant, spicy South African vegetable relish that’s a staple at braais (barbecues) and family gatherings. This zesty dish, bursting with bold flavors from fresh vegetables, beans, and aromatic spices, is a versatile side that pairs perfectly with pap (maize meal porridge), grilled meats, or even as a standalone dip. Rooted in South African township cuisine, chakalaka’s heat and tang make it a crowd-pleaser. Below, I’ll walk you through a detailed, step-by-step recipe to create an authentic chakalaka that serves 6-8, written in a warm, approachable blog style.
Why Chakalaka Will Steal Your Heart
Chakalaka is the kind of dish that brings people together. Its colorful medley of vegetables and customizable spice level make it a hit for any occasion, from casual dinners to festive celebrations. Whether you’re new to South African cooking or a seasoned pro, this recipe is straightforward and packed with tips to ensure your chakalaka is a flavor explosion. Let’s get cooking!
Ingredients for Authentic Chakalaka
To whip up a delicious chakalaka, gather these fresh and pantry-friendly ingredients:
- Vegetables:
- 2 large onions, finely chopped
- 2 medium green bell peppers, diced
- 2 medium red bell peppers, diced
- 3 large carrots, grated
- 3 medium tomatoes, chopped (or 1 can diced tomatoes, drained)
- 2 cups shredded cabbage (optional, for extra texture)
- 2-3 green chilies, finely chopped (adjust for spice preference)
- 3 cloves garlic, minced
- 1 tablespoon fresh ginger, grated
- Pantry Staples:
- 1 can (400g) baked beans in tomato sauce
- 2 tablespoons vegetable oil
- 1 tablespoon curry powder (mild or hot, based on preference)
- 1 teaspoon smoked paprika
- 1 teaspoon ground cumin
- 1 teaspoon chili powder (optional, for extra heat)
- 2 tablespoons tomato paste
- 1 cup vegetable stock or water
- Salt and black pepper to taste
- Optional for Garnish:
- Fresh cilantro or parsley, chopped
- Lemon wedges for a zesty finish
Equipment:
- Large, heavy-bottomed skillet or saucepan
- Wooden spoon for stirring
- Sharp knife and cutting board
- Grater for carrots
Step-by-Step Instructions for Perfect Chakalaka
Follow these steps to create a flavorful chakalaka that’s sure to impress. The key is balancing the spices and letting the vegetables meld into a harmonious relish.
Step 1: Prep Your Ingredients
Chakalaka comes together quickly, so have all your vegetables chopped, grated, and ready to go. Finely chop the onions, dice the bell peppers, grate the carrots, chop the tomatoes, mince the garlic, and grate the ginger. If using fresh chilies, remove the seeds for milder flavor or keep them for extra heat. Having everything prepped makes the cooking process smooth and stress-free.
Pro Tip: Use a food processor for grating carrots or chopping vegetables if you’re short on time, but hand-chopping gives a rustic texture.
Step 2: Heat the Oil and Sauté Aromatics
In a large skillet or saucepan, heat 2 tablespoons of vegetable oil over medium heat. Add the chopped onions and sauté for 5-7 minutes until soft and translucent. Stir in the minced garlic, grated ginger, and chopped green chilies, cooking for another 1-2 minutes until fragrant.
Why This Matters: This aromatic base sets the stage for chakalaka’s bold flavors, so don’t rush the sautéing.
Step 3: Add the Spices
Sprinkle in the curry powder, smoked paprika, ground cumin, and chili powder (if using). Stir for 30 seconds to toast the spices, releasing their aromas. This step is crucial for deepening the flavor profile. Add the tomato paste and cook for another 1-2 minutes, stirring to prevent burning.
Step 4: Cook the Vegetables
Add the diced green and red bell peppers, grated carrots, and shredded cabbage (if using). Stir to coat the vegetables in the spice mixture. Cook for 5-7 minutes, stirring occasionally, until the vegetables start to soften. Then, add the chopped tomatoes (or canned tomatoes) and stir to combine. The tomatoes will release juices, creating a saucy base.
Note: If you prefer a chunkier chakalaka, don’t overcook the vegetables—they should retain some bite.
Step 5: Incorporate the Beans and Liquid
Add the can of baked beans in tomato sauce, stirring gently to combine. Pour in 1 cup of vegetable stock or water to achieve your desired consistency—chakalaka should be thick but not dry. Reduce the heat to low and let the mixture simmer for 10-15 minutes, allowing the flavors to meld. Stir occasionally to prevent sticking.
Pro Tip: If you want a thicker relish, simmer uncovered. For a saucier texture, add a bit more stock or water.
Step 6: Season and Taste
Taste your chakalaka and adjust the seasoning with salt and black pepper. If you want more heat, add a pinch of chili powder or an extra chopped chili. For a tangy kick, squeeze in a bit of lemon juice. Simmer for another 2-3 minutes to let the flavors settle.
Step 7: Serve and Garnish
Remove the skillet from the heat and let the chakalaka cool slightly. Transfer to a serving bowl and garnish with fresh cilantro or parsley for a burst of color and freshness. Serve warm or at room temperature with pap, grilled meats, or as a dip with crusty bread. Chakalaka also tastes amazing the next day as the flavors deepen.
Tips for Chakalaka Success
- Adjust the Heat: Chakalaka can be mild or fiery. Tailor the chili quantity to your taste, or offer extra chilies on the side for spice lovers.
- Make It Your Own: Swap in vegetables like zucchini, peas, or corn for variety. You can also use kidney beans or chickpeas instead of baked beans.
- Storage: Chakalaka keeps well in the fridge for up to 5 days. Reheat gently or serve cold as a salad.
- Versatility: Use it as a topping for burgers, a filling for wraps, or a side for stews like potjiekos.
Why Chakalaka Is a Must-Try
Chakalaka is more than a side dish—it’s a celebration of South African flavors and culture. Its bold spices, colorful vegetables, and adaptability make it a go-to recipe for any occasion. Whether you’re serving it at a braai or enjoying it as a weeknight side, this dish brings warmth and joy to the table. So, grab your skillet, crank up so