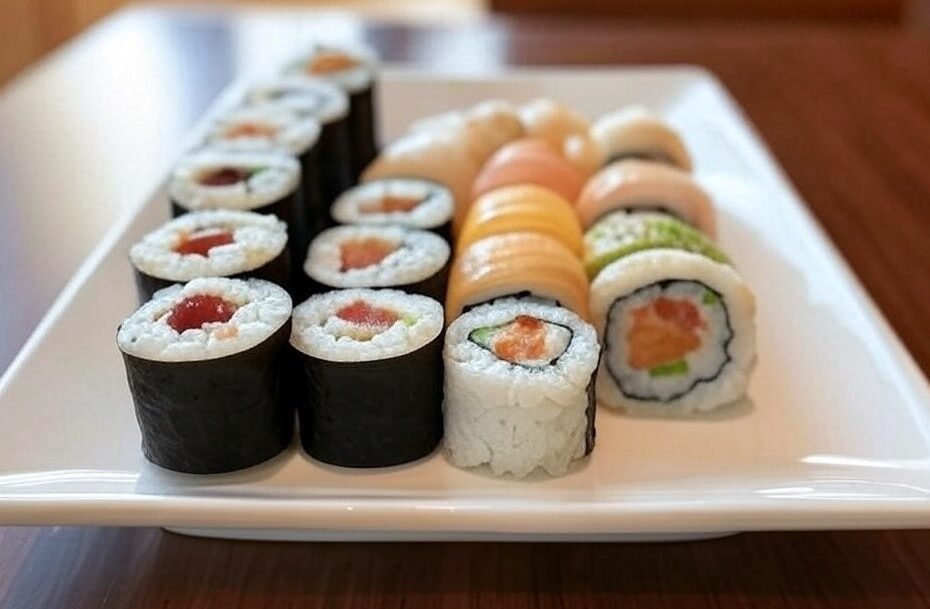
Maki sushi, one of the most recognizable forms of sushi, is a Japanese dish featuring sushi rice and various fillings—like raw or cooked fish, vegetables, and avocado—wrapped in a sheet of nori (dried seaweed) and rolled into a tight cylinder. The roll is then sliced into bite-sized pieces, revealing a beautiful cross-section of colorful ingredients. Maki is loved for its balance of flavors: the tangy sushi rice, the umami of nori, and the freshness of the fillings. Often served with soy sauce, wasabi, and pickled ginger, maki is a versatile dish that can be adapted to suit different tastes, making it a perfect introduction to sushi-making at home. Let’s roll up our sleeves and create this classic Japanese treat!
Ingredients (Makes 4 Maki Rolls, About 24 Pieces)
For the Sushi Rice
- 300g (1.5 cups) sushi rice (short-grain Japanese rice)
- 360ml (1.5 cups) water (for cooking rice)
- 4 tablespoons rice vinegar
- 2 tablespoons sugar
- 1 teaspoon salt
For the Maki Fillings (Choose Your Favorites)
- 100g sushi-grade raw fish (e.g., tuna or salmon, sliced into 0.5 cm thick strips) or 100g cooked crab sticks (imitation crab) or 100g cooked shrimp, peeled and deveined
- 1 avocado, peeled, pitted, and sliced into thin strips
- 1 small cucumber, peeled, seeded, and cut into matchsticks
- 1 medium carrot, peeled and cut into matchsticks (optional, blanched for 1 minute to soften)
For Rolling and Assembly
- 4 sheets nori (dried seaweed, full size, about 20×18 cm)
- 1 tablespoon toasted sesame seeds (optional, for extra flavor)
- 1 tablespoon black sesame seeds (optional, for garnish)
For Serving
- Soy sauce
- Wasabi paste
- Pickled ginger (gari)
- Optional: Sliced green onions or microgreens (for garnish)
Equipment
- Rice cooker or medium pot with lid
- Wooden or plastic mixing bowl (for sushi rice, avoid metal to prevent a metallic taste)
- Bamboo sushi mat (makisu, for rolling)
- Sharp knife (preferably a sushi knife or very sharp chef’s knife)
- Small bowl of water (mixed with 1 teaspoon rice vinegar, to wet hands and knife)
- Clean kitchen towel or plastic wrap (to cover the bamboo mat)
- Cutting board
Step-by-Step Recipe
Step 1: Prepare the Sushi Rice
The foundation of great maki is perfectly seasoned sushi rice—sticky, tangy, and slightly sweet.
- Rinse the Rice: Place the sushi rice in a bowl and rinse under cold water, gently swirling with your hands. Repeat 3-4 times until the water runs clear to remove excess starch. Drain well.
- Cook the Rice: In a rice cooker or medium pot, combine the rinsed rice with 360ml water. Cook according to your rice cooker’s instructions, or bring to a boil on the stovetop, then reduce to low heat, cover, and simmer for 15 minutes. Turn off the heat and let the rice steam, covered, for another 10 minutes.
- Make the Sushi Vinegar: While the rice cooks, combine rice vinegar, sugar, and salt in a small saucepan. Heat over low heat, stirring until the sugar and salt dissolve (do not boil). Alternatively, microwave for 20-30 seconds and stir. Let it cool slightly.
- Season the Rice: Transfer the cooked rice to a large wooden or plastic mixing bowl. Pour the sushi vinegar over the rice and gently fold it in using a wooden spatula or rice paddle, using a cutting motion to avoid mashing the grains. Fan the rice as you mix to cool it down and give it a glossy finish (you can use a handheld fan or a piece of cardboard). Once cooled to room temperature, cover with a damp cloth to keep it moist.
Pro Tip: Properly seasoned sushi rice should be sticky but not mushy, with each grain distinct. Avoid refrigerating the rice, as it will harden—use it at room temperature for the best texture.
Step 2: Prepare the Fillings
While the rice cools, let’s prep the fillings for the maki rolls.
- Prepare the Fish (If Using Raw): Ensure your fish is sushi-grade (safe for raw consumption). Slice into 0.5 cm thick strips, about 1 cm wide and the length of the nori sheet (around 18 cm). Keep refrigerated until ready to use.
- Prepare Cooked Fillings (If Using): If using crab sticks, gently shred them into strips. If using shrimp, ensure they’re cooked, peeled, and deveined—slice in half lengthwise if large.
- Prep the Vegetables: Slice the avocado into thin strips, about 0.5 cm thick. Cut the cucumber and carrot (if using) into matchsticks, about 0.5 cm thick and the length of the nori sheet. If using carrots, blanch them in boiling water for 1 minute to soften, then drain and cool.
Pro Tip: Keep fillings uniform in size for even rolling. If using raw fish, ensure your workspace and tools are clean to maintain food safety.
Step 3: Set Up Your Rolling Station
A well-organized station makes rolling maki much easier.
- Prepare the Bamboo Mat: Lay the bamboo sushi mat flat on a clean surface. Cover it with a sheet of plastic wrap to prevent rice from sticking (optional but helpful for beginners). Have a small bowl of water mixed with 1 teaspoon rice vinegar nearby to wet your hands and knife.
- Lay Out Ingredients: Place the nori sheets, sushi rice, fillings, and sesame seeds within reach. Keep a clean, damp kitchen towel handy to wipe your hands or knife as needed.
Step 4: Assemble the Maki Rolls
Now, let’s roll the maki—don’t worry if your first roll isn’t perfect; practice makes progress!
- Lay the Nori: Place a sheet of nori on the bamboo mat, shiny side down, with the longer edge facing you. If the nori has perforated lines, align them horizontally.
- Spread the Rice: Wet your hands with the vinegar-water mixture to prevent sticking. Scoop about 3/4 cup of sushi rice and spread it evenly over the nori, leaving a 2 cm border at the top edge (furthest from you). The rice layer should be thin—about 0.5 cm thick—so you can see patches of nori through it. Sprinkle with a pinch of toasted sesame seeds, if desired.
- Add the Fillings: About 2 cm from the bottom edge (closest to you), arrange your fillings in a horizontal line across the rice. For example:
- Lay 2-3 strips of tuna or crab sticks.
- Add a few strips of avocado and cucumber next to the fish. Don’t overfill—use about 2-3 types of fillings per roll to ensure it rolls tightly.
- Roll the Maki: Lift the bottom edge of the bamboo mat with your thumbs, holding the fillings in place with your fingers. Roll the nori over the fillings, pressing gently but firmly to create a tight cylinder. Continue rolling until you reach the top border of the nori. Wet the border with a bit of water to seal the roll.
- Shape the Roll: Use the bamboo mat to gently shape the roll into a uniform cylinder, applying even pressure to ensure it’s compact. Unwrap the mat and set the roll aside, seam side down. Repeat with the remaining nori sheets and fillings to make 4 rolls.
Pro Tip: Keep your hands damp while spreading the rice to prevent sticking, but don’t over-wet, or the nori will become soggy. Press firmly but not too hard when rolling to avoid squashing the fillings.
Step 5: Slice the Maki Rolls
Slicing the rolls cleanly is key to a beautiful presentation.
- Prepare the Knife: Wet a sharp knife with the vinegar-water mixture to prevent sticking. Wipe the knife clean with a damp towel between cuts.
- Slice the Rolls: Place a roll on a cutting board, seam side down. Cut the roll in half with a gentle sawing motion, then cut each half into 3 equal pieces, yielding 6 pieces per roll. Repeat with the remaining rolls. You should have 24 pieces total.
- Arrange the Pieces: Arrange the maki pieces on a platter, standing them upright to show the fillings or laying them on their sides. Sprinkle with black sesame seeds or garnish with green onions or microgreens, if desired.
Pro Tip: If the roll doesn’t hold its shape, it may be overfilled or not rolled tightly enough. Practice makes perfect—your rolls will improve with each attempt!
Step 6: Serve the Maki
Let’s present the maki with classic sushi accompaniments for an authentic experience.
- Prepare Dipping Sauce: Pour soy sauce into small dipping bowls for each person. Add a small dollop of wasabi paste and a few slices of pickled ginger on the side.
- Serve Immediately: Serve the maki rolls fresh, as the nori can become chewy if left too long. Encourage diners to dip lightly in soy sauce and mix in a bit of wasabi for a spicy kick. The pickled ginger acts as a palate cleanser between bites.
Serving Tip: Maki is best enjoyed at room temperature. If you need to store the rolls briefly, wrap them tightly in plastic wrap and refrigerate for up to 1-2 hours, but avoid letting the nori sit too long, as it will lose its crispness.
Tips for Success
- Sushi-Grade Fish: If using raw fish, ensure it’s labeled sushi-grade or sashimi-grade, and purchase from a reputable source. Freeze the fish for at least 24 hours before thawing to kill any potential parasites (a common safety practice).
- Nori Quality: Use fresh, crisp nori for the best texture. If it feels soft or chewy, lightly toast it over an open flame for a few seconds to restore its crispness.
- Rolling Technique: The key to a good maki roll is even pressure—too loose, and it falls apart; too tight, and the fillings get squashed. Practice rolling with the bamboo mat to get the hang of it.
- Vegetarian Option: Skip the fish and use a combination of avocado, cucumber, carrot, and pickled radish for a delicious veggie maki roll.
- Storage: Sushi rice is best used fresh, as it hardens in the fridge. If you have leftovers, store the rolls in an airtight container in the fridge for up to 1 day, but the nori may become soggy.
Nutritional Information (Per Serving, Approximate, 6 Pieces)
- Calories: 200-250 kcal (varies by fillings)
- Protein: 8g (more if using fish)
- Fat: 5g
- Carbohydrates: 35g
- Sodium: 500mg (varies by soy sauce usage)
Maki sushi is a delightful way to explore Japanese cuisine, offering endless possibilities for fillings and flavors. Whether you’re hosting a sushi night or enjoying a quiet meal at home, this recipe brings the art of sushi-making to your kitchen.